Warung Bebas
Showing posts with label poe. Show all posts

Friday, March 5, 2021

PoE Speed Fast Ethernet Switch Review (PS-POE18P) – MBReviews

[ad_1]

The PoE Speed PS-POE18P is an unmanaged Fast Ethernet switch built with a very specific role in mind and that’s to provide both power and the means to transfer data to your PoE devices.

If you’re not familiar with the term Fast Ethernet, it means that the connection is limited to 100Mbps and I know that there are already multi-Gigabit Ethernet switches available even for the SMBs due to the WiFi 6 (6E) standard, but the PS-POE18P was not really built for handling your modern networking devices (it’s going to mercilessly bottleneck your Gigabit access points), but to help connect multiple PoE cameras (where the bitrate rarely goes above 6,500Kbps) or for extending your network and adding some printers or IP phones that otherwise would not have an Ethernet port available on your router.

poe-speed-ps-poe18p

One interesting feature that caught my eye is the Extended mode which pushes the range of the connection up to 820 feet if you’re using a CAT6 cable, so it’s in the same category as the long range TRENDnet TPE-LG80 Ethernet switch, allowing you to mount outdoor-suitable cameras farther from your house. There also seems to be support for VLAN and the entire enclosure is metallic, so, without further ado, let’s check out this no-frills Ethernet switch and see whether it’s worth purchasing for your PoE devices.

Design and Build Quality

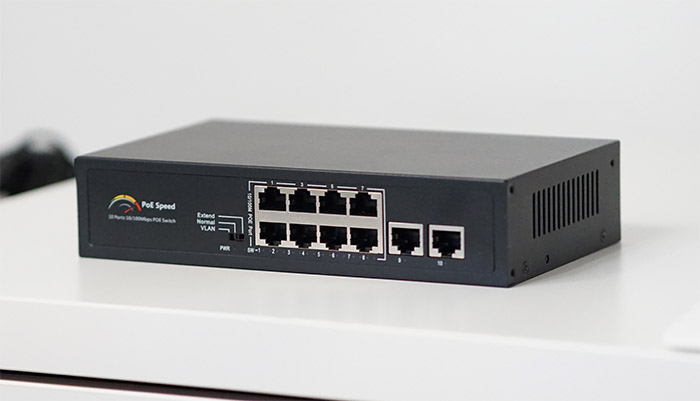
The PoE Speed PS-POE18P is quite compact and went with the usual rectangular case, so it’s nothing fancy design-wise (unlike some Netgear switches that look like spaceships) and that’s a good thing considering that the device will most likely end up in a rack. Indeed, the Ethernet switch does have some mounting holes on both sides and you do get a couple of metallic mounting brackets in the package, although you may need some extensions as well. And that’s because the PoE Speed switch measures only 8 x 4.75 x 1.75 inches, but it does have some weight to it, enough to actually make it feel like it’s a more expensive device that it actually is (it weighs 1.98 lb). And that’s also enforced by the metallic body which is a nice touch for a fairly inexpensive Ethernet switch (the front panel is made of plastic).

poe-speed-ps-poe18p-rear

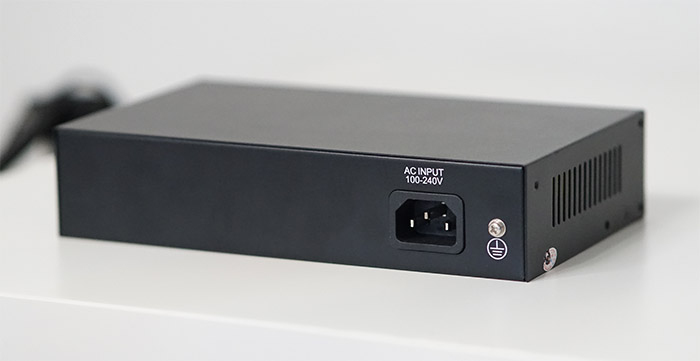
The device is covered by a black matte finish and the manufacturer has added a few ventilation holes on the left and right side to ensure that the Ethernet switch won’t overheat. And, in most cases, it barely gets warm, but, if you go to the maximum available PoE budget, the case does indeed start to warm up (but only slightly). Besides being rack-mountable, the PS-POE18P can also be mounted on the wall thanks to the two holes that can be found on the bottom of the switch and I would have liked to see some silicone feet as well since, in its current state, the PS-POE18P likes to move around on my desk. The rear side of the device is occupied by a DC-In power connector and a grounding screw, so all the ports, LEDs and buttons are positioned on the front side.

From the right, you get two Fast Ethernet non-PoE ports, followed by eight Fast Ethernet PoE ports that support the 802.3af/at standards. Underneath this block of ports, you get two LEDs for each fast Ethernet port and, while they’re a bit weirdly placed (easier to solder them on the PCB), they do get the job done: one LED will light up to show that there is a connection at either 10 or 100Mbps, while the other LED is for showing that the connected device uses the PoE technology. Further to the left, there is a Power LED and the Dial LED (will turn on when you enable the Extend mode or the VLAN) – the problem is that all these LEDs are very small and slightly dim, so it’s very hard to see them unless you look straight at them (not at an angle).

poe-speed-ps-poe18p-leds
Above the PWR LED, there’s a switch that, by default is set to Normal, but you can set it to Extend, which will enable the long range PoE support for the LAN ports and you can also set it to VLAN which will isolate the 8 PoE+ ports from each other.

Internal Hardware

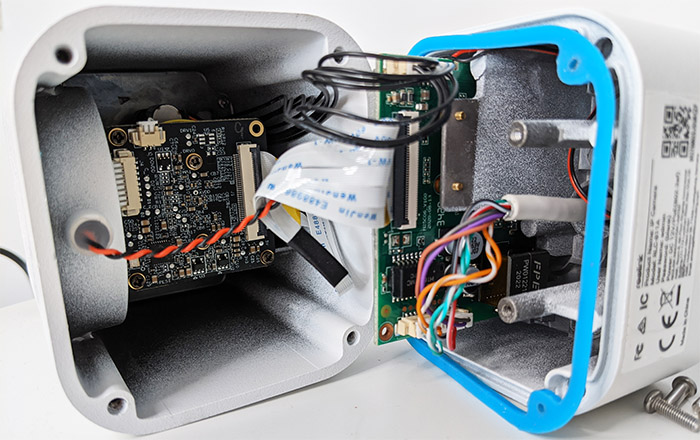
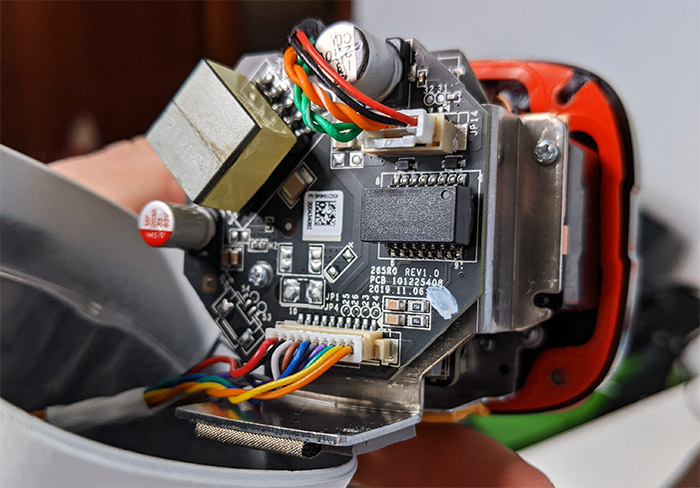
In order to open up the case, I had to remove four screws (two on the left side and two on the right – be aware that one is going to be covered by a QC stamp and removing it may lead to warranty void) and then, I had to simply slide the top side, exposing the PCB. Here, it worth mentioning the internal PSU and then, I was able to identify two United-tek G4801DR 10/100M Base Transformers, one SLK DC2064DG IC, a XLSEMI XL7015E1 94054 Power Management IC DC-DC Converter, an IP178G 2009S12 PPRSN54.00 10/100M Ethernet Integrated Switch chip, an IP175G 2003S12 PPRHY45.00 10/100M 10/100 PHY Switch Controller and eight HY0310 FA060C28 G high flux LEDs.

poe-speed-ps-poe18p-circuits
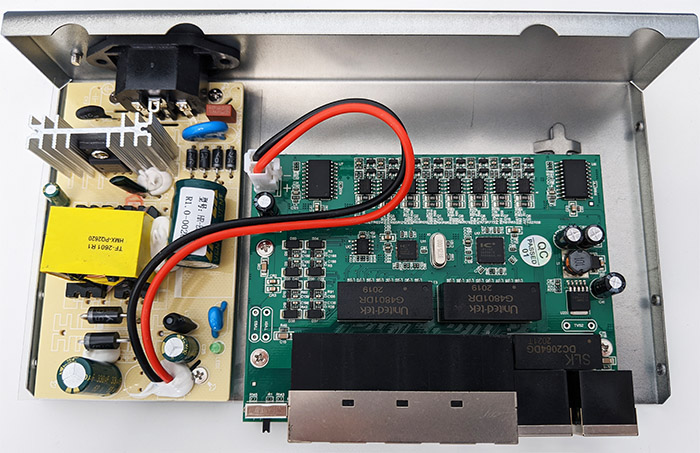
Note: The PoE Speed PS-POE18P features a packet forwarding rate of 0.1488Mbps, 1K MAC addresses, a backplane bandwidth of 2Gbps and the cache of each port is 448K.

Setup and Features

The PoE Speed PS-POE18P can be considered an unmanaged Ethernet switch since it doesn’t require any software, so it’s essentially a plug and play device. This means that after mounting the switch inside a rack or on the wall, connect the power cord to the back of the case and, after the PWR LED turns red, you can start adding your PoE (or non-PoE) devices. Be aware that the Fast Ethernet limitation is very much noticeable especially in 2021, so, if you have a 100Mbps+ Internet connection and want to connect a PoE access point, I would advise against it. But, as I said in the introduction, even the more demanding PoE security cameras should work great with this Ethernet switch. The manufacturer says that the maximum PoE budget is 120W and, depending on the standard, it can be 15.4 W per port (802.3af) or 30W per port (802.3at).

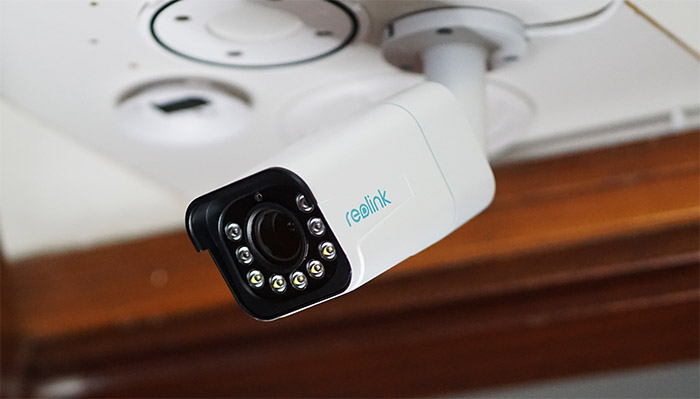
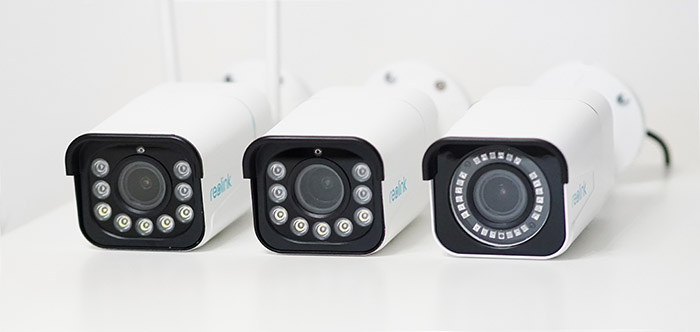
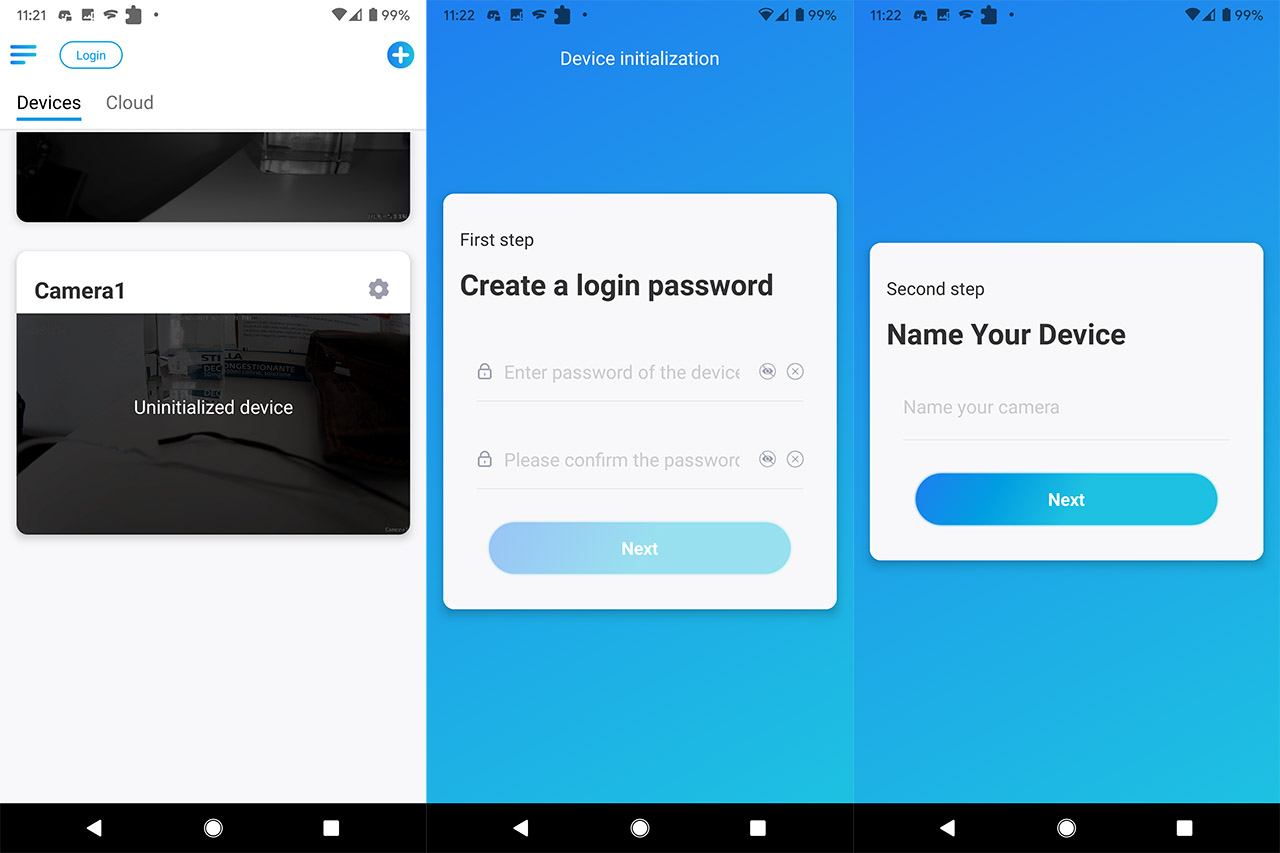
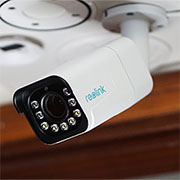
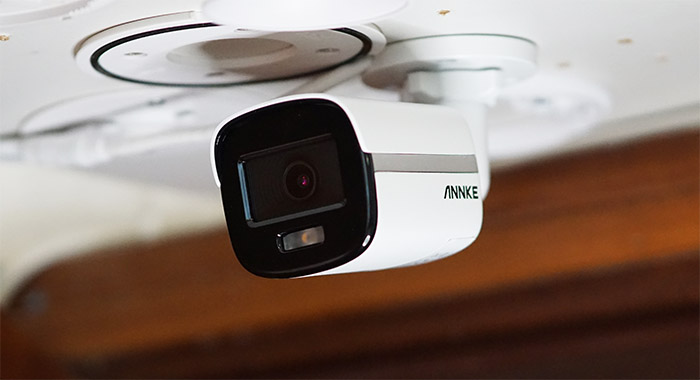
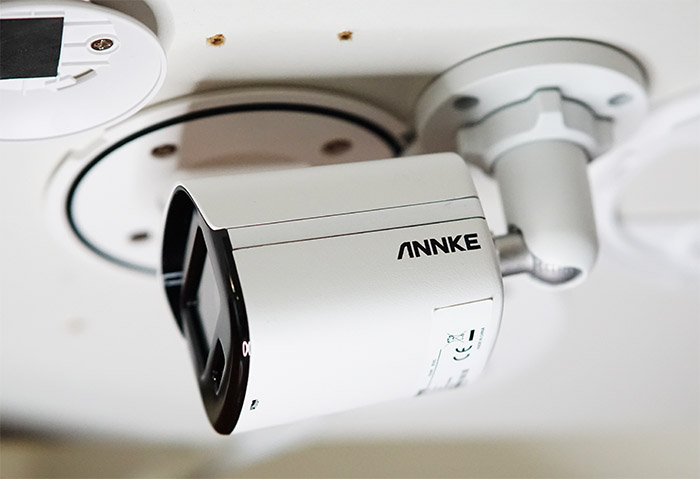
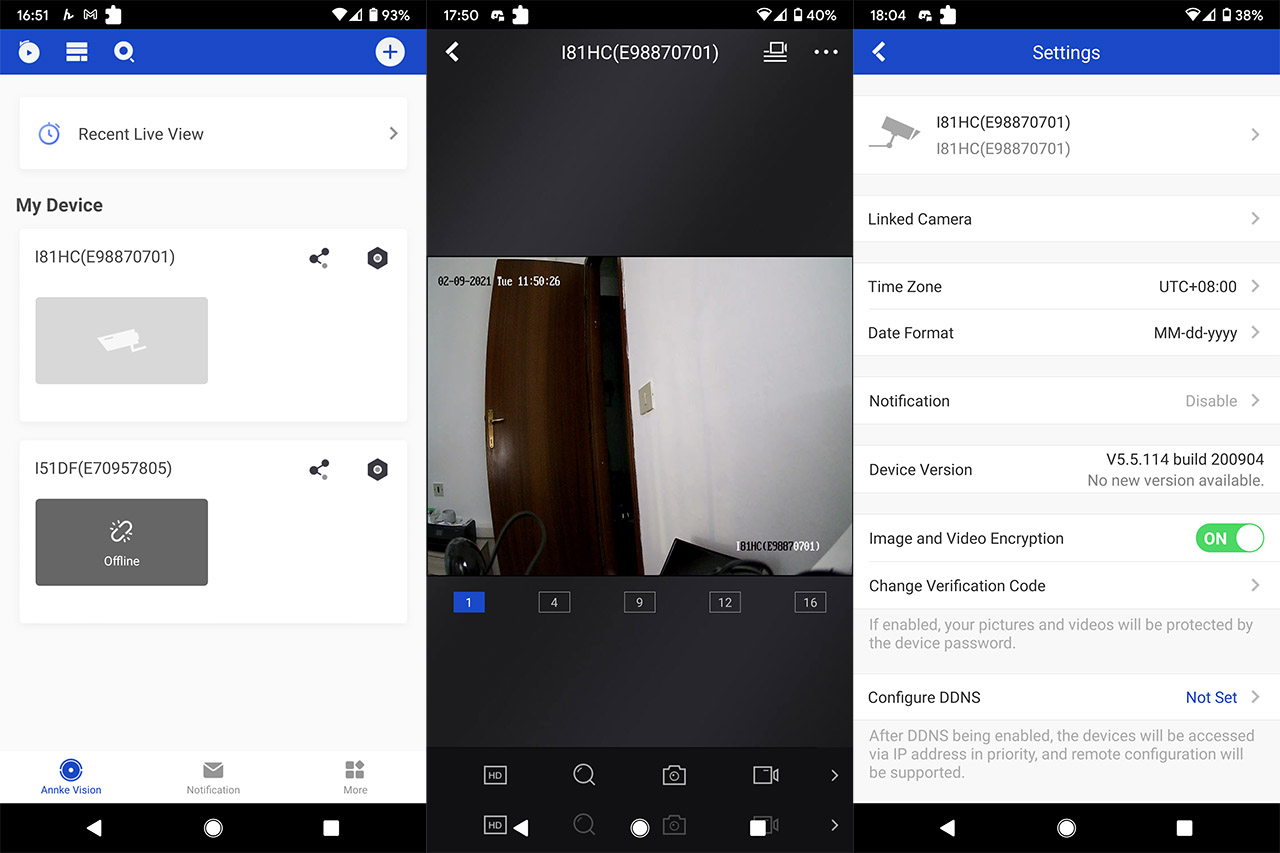
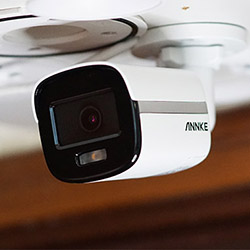
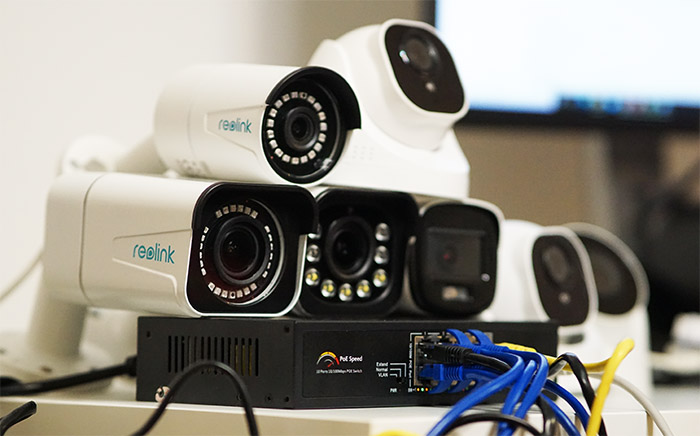
Obviously, if you reach the max PoE budget with four client devices, then the rest of the ports will have PoE disabled. To check out how well the Ethernet switch can handle multiple connections, I decided to use one of the two non-PoE ports for the direct connection with the router and then, I took eight security cameras to make use of all the poE ports. The cameras that I used are from Reolink (RLC-511, RLC-520, RLC-520A, RLC-811A, RLC-510A and RLC-522) and Annke (NC400 and C500), each camera requiring less than 12W from the PoE budget, so all should be powered on and the data transmission should be unaffected. And indeed, everything went fine, the Ethernet switch had no problem keeping all the cameras alive and I could check the live footage from their dedicated apps.

poe-speed-ps-poe18p-cameras

The PoE Speed PS-POE18P can also extend the range of the ports up to 820 feet (250 meters), but only if you use CAT6+ cables, otherwise, the maximum is 328 feet which is the default for CAT5 or CAT5E cables. Unfortunately, I did not have a CAT6 cable that’s as long as 820 feet, so I can’t really check the throughput, but I do expect it to have some severe limitations, such as the TRENDnet TPE-LG80 did (could go only up to 10Mbps when extended). In any case, I still connected a Ubiquiti UAP-AC-PRO and checked the LAN to LAN performance using a short CAT5E cable (I chose this wireless access point since it has two LAN ports, unlike the nanoHD): from the client to the server, I saw an average of 94.9Mbps and from the server to the client, I saw the same 94.9Mbps. Using a 328 feet CAT 5E cable did show a similar throughput, as expected.

Conclusion

The PoE Speed PS-POE18P is not the Ethernet switch to get if you want to extend a network that pushes data at more than 100Mbps (so not that great with Gigabit access points) due to its Fast Ethernet limitation, but it wasn’t really built for this reason. It was designed to handle multiple PoE surveillance cameras (for a home or even an office) or to connect a few printers in case your router doesn’t have enough free ports. And, as a bonus, the case is made of metal, doesn’t heat up even after I connected eight PoE cameras and you do get both the Extend and the VLAN modes. Furthermore, the price tag is fair for what the Ethernet switch offers, so, if you’re in the market for this type of device, it’s definitely worth checking out.

PoE Speed PS-POE18P

-

poe-speed-ps-poe18p

Pros

  • Can handle an entire "battalion" of PoE cameras
  • The case is metallic
  • Extended mode + VLAN
  • Plug and Play
  • PoE support

Cons

  • Fast Ethernet limitation (the switch feels very dated from a technological point of view)
  • No bottom-placed feet
logo

Mark is a graduate in Computer Science, having gathered valuable experience over the years working in IT as a programmer. Mark is also the main tech writer for MBReviews.com, covering not only his passion, the networking devices, but also other cool electronic gadgets that you may find useful for your every day life.


[ad_2]

Sunday, February 28, 2021

Smart Motion Detection and Color Night Vision – MBReviews

[ad_1]

The Reolink RLC-811A is currently the top PoE camera model from the RLC series, sporting most of the features that can be found on other Reolink cameras, such as the SuperHD resolution (but this time at 4K) and that extra A at the end of the name means that the camera supports the new smart motion detection technology.

I’ve already seen this tech on the RLC-511WA and on the RLC-520A, and it worked really well, being able to easily to tell apart moving objects from humans. But that’s not all because, similarly to the aforementioned RLC-511WA, the camera does offer colored night vision using a front-positioned spotlight (not the same implementation as on the Annke NC400) and the 5x zoom does make far more sense on a 4K camera. Not that the RLC-511WA didn’t perform well, it’s just that the Reolink RLC-811A should be able to deliver a far better image quality (since I doubt that extra pixels are just for show).

reolink-rlc-811a

Of course, this is not a WiFi camera, so you will either need to choose between a power adapter or a PoE connection and the device is, as usual, built rugged enough to withstand the elements. All of these features should render the RLC-811A one of the best cameras that Reolink has built so far, while also keeping the price tag as affordable as possible, so let’s check it out and see if it manages to blow all of its competitors out of the water.

Design and Build Quality

The Reolink RLC-811A looks very similar to the RLC-511 and the RLC-511WA that I recently tested, so expect a fairly large metallic case covered by a white matte finish and, consider its generous size, it’s hard to go unnoticeable when mounted on a ceiling or wall. And that’s pretty much the point of these security devices, they need to be clearly visible in order to discourage any potential trespasser – if the size won’t do it, there’s the bright spotlight that consists of five big LEDs underneath the front-facing lens. That being said, the RLC-811A measures 3.0 x 2.83 x 5.43 inches without the stand (and 9.37 with the stand fully extended) so, it’s essentially just as big as the RLC-511WA, minus the antennas.

reolink-rlc-811a
Left: RLC-511WA. Center: RLC-811A. Right: RLC-511.

There are other similar elements with the aforementioned WiFi camera, such as the bottom-mounted speaker that’s covered by a circular metallic piece and the blue-colored silicone band that divides the front and the rear parts of the case. As I do with all cameras, I decided to take the RLC-811A apart to see what the manufacturer has inserted inside the metallic shell.
The tear-down process involves removing the four screws from the rear side of the camera and then to slide the front section to reveal the internal components. This way, I was able to identify the NT98523MBG 2004-BB T8N60400 processor, 256 MB of RAM from SKHynix (H5TQ2G63GFR RDC 928V NWMN7918WH), 128 MB of flash memory (GigaDevice FP2024 5F1GQ4UBYIG) and a Ruimeng MS41929 JCQA05 IC. So it’s not just the internal layout that’s almost identical to the RLC-511WA, but the components are also the same, minus the RAM which comes from a different manufacturer.

After adding it all back together, I had to put the silicone seal properly into place in order for the camera to retain its IP66 rating. Indeed, the RLC-811A is dust proof and will remain functional when powerful jets of water are directed towards its metallic enclosure (which is great in case of powerful storms). The RCL-811A is not really mountable in the open, but, in any case, make sure to take all the necessary precautions against lightning (add surge protectors).

reolink-rlc-811a

You should also take into account the temperature at which the device will remain operational – it’s down to 14°F and up to 131°F, so it should do fine in areas where the winters aren’t too harsh. The front of the camera is also very similar to the RLC-511WA, so the four IR LED pcs are there, as well as the brightness sensor and the five LEDs for the spotlight. On the bottom of the camera, besides the speaker, there’s also a microphone, so yes, it does support a tow-way communication (you can simply scare any intruder – it’s better to rely on the horn, but screaming should also do the trick).

The metallic arm requires manual adjustments and, after you’ve put it into place, use the hex key (from the package) to block it into position. The cable that’s attached to the camera is also white to better camouflage itself with the wall (before, it was black) and, towards the end, it gets divided into three separate shorter and narrower cables. First, there’s the Reset cable (press and hold the button at the end for about 10 seconds to return the RLC-811A to its default settings), the second cable allows you to connect a power cable (there isn’t one in the package), while the third one supports an Ethernet connection and yes, you do get a fairly short Ethernet cable in the box. It’s clear that the preferred option is PoE since you only have to use one cable instead of two for both data transfer and for powering up the camera.

reolink-rlc-811a

Setup and Functionality

The hardware installation is similar to most other bullet-shaped cameras, so you will need to drill three holes and then screw the camera arm into place, but the power source is where things get interesting. You can purchase a separate power adapter and rely on an Ethernet cable to send and receive data from your router, but, since this is a PoE camera, it’s better to either use a PoE switch (even a cheaper unmanaged one will do the trick) or a PoE adapter (the RLC-811A supports PoE 802.3af, 48V active). In case you can’t run an Ethernet cable outdoors, but do have a power source near the place where you mounted the camera, you can give a chance to the Reolink RLC-511WA since, even though the image quality is not just as good, you do get all other features + the dual-band wireless capability.

After that’s done, you do need to download and install the Reolink app on your mobile device (it will work with both Android and iOS) and, in my case, since I was already connected to the local network (while the camera was connected to the same router), the application immediately detected the uninitialized Reolink camera.

reolink-rlc-811a-app

Tap on it to start the wizard which will guide you through creating a login password for the camera, to give it a name (to easily identify it in case you have multiple Reolink cameras) and that’s all, the entire process can take less than a minute before you get access to the live footage. As with other Reolink cameras, you get to see the current bitrate on the top left corner and it seems that the manufacturer has kept the same upper limit at 8,192Kbps, but, in my case, while the image quality was set to High, the bitrate averaged at about 6,500Kbps regardless whether it was during the day or night.

Pages: 12

Reolink RLC-811A

-

Reolink RLC-811A

Pros

  • 4K resolution (SuperHD)
  • 5x zoom
  • Color night vision
  • Spotlight
  • Smart motion detection

Cons

  • The footage is sometimes out of focus
logo

Mark is a graduate in Computer Science, having gathered valuable experience over the years working in IT as a programmer. Mark is also the main tech writer for MBReviews.com, covering not only his passion, the networking devices, but also other cool electronic gadgets that you may find useful for your every day life.


[ad_2]

Wednesday, February 10, 2021

Annke NC400 True Full Color Night Vision PoE Camera Review (I81HC) – MBReviews

[ad_1]

The Annke NC400 is one of the first PoE cameras to make use of the new NightChroma technology which has the role of rendering the night footage in full color. And yes, I know that a lot of other manufacturers have taken pride in achieving colored night vision, but the NC400 blows all of its competitors (in the same price range) out of the water due to its noise-less footage the there is little light and in case it’s pitch dark, the camera makes use of the built-in spotlight to maintain the zone of interest fully visible (and in color!).

Of course, the manufacturer has also focused towards offering an excellent day-time footage by relying on the 120dB true Wide Dynamic Range tech, as well as on 3D DNR and other image enhancement algorithms and, considering that this is an outdoors-suitable device, the NC400 is also build to withstand the elements.

annke-nc400-camera

I have recently tested another Annke camera, the C500 and I was impressed by its seamless ONVIF compatibility that seems to also be a part of the NC400 and there is, of course, PoE support for an easy installation. And that’s essentially what the users require from an outdoor camera, great image quality during the day and especially during the night, some flexibility in installation and a rugged exterior to survive outdoor conditions. Since the Annke NC400 seems to tick all the boxes, let’s have a closer look at this new device and see whether it’s the best security camera in its category.

Design and Build Quality

The Annke NC400 doesn’t drift too far from the traditional bullet-shaped camera, so, design-wise, it features a rectangular case fully made of metal and, apart from the front side, the device is covered by a white matte finish. There are some silver bands on the sides which I suspect will be a design signature for the new NightChroma camera series and I do like that they do serve a purpose above pure aesthetics (the teardown process has revealed that they keep the internal section in place). The Annke NC400 measures 6.3 x 2.7 x 2.6 inches, so it’s fairly compact and won’t attract too much attention towards itself, but don’t worry, that bright spotlight will make sure that the camera will make its presence known to any trespasser.

annke-nc400-side

Indeed, the front section is a bit more different than on other IP cameras which usually have the lens in the middle and the IR LEDs surrounding it. Instead, the NC400 has the front panel divided by a plastic cover into two sections: a larger one for the 4-megapixel lens and a smaller one for the spotlight. This cover can be removed to reveal a motion sensor and the user manual suggests that there is also a microphone (although I wasn’t able to see it in action), but no speaker, so the camera doesn’t support a two-way communication. As I did with almost all other camera that I tested, I decided to open up the case of the NC400 to see its internal hardware. To access (and remove) the four screws, you need to gently detach the front plastic side (it’s kept by some plastic hinges) and then use the hole on the bottom of the camera (yes, every element has a purpose on the NC400) to slide the internal section outside.

This way, we get to see three interconnected boards, each with it own set of circuits: I was able to identify a HST-0064SXCR Group-Tek 2017 transistor, 128MB of flash memory (SPI NAND) from Dosilicon (1952A DS35Q1GA-1B) which is quite a bit for a security camera and what seems to be 128MB of RAM (SEC025 K4B2616). I also saw the HK-2019-8 CD9291945 chip which I couldn’t clearly identify, but I assume that this is the SoC responsible for the image processing. Before putting it back together and closing up the case, I noticed a silicone seal which has the role to keep out water and dust, and, as anticipated, the Annke NC400 is indeed IP67 rated, so you can leave it outdoors without worrying about the elements. Obviously, take all the necessary precautions against lightning strikes (add some surge protectors), but other than that, the camera is perfectly suited for harsh environments: it will remain operational when the temperature ranges between -22 degrees F and 140 degrees F (more than enough for those Canadian winters).

annke-nc400-camera-hardware

The camera relies on a stand to be mounted on a wall (there are three screws inside the package) and you will have to manually adjust the angle of the device – use circular piece to fix it into place. From within the stand, there’s a cable that come through (it’s attached to the main body of the camera) and it divides itself into two pieces at the end: one for the DC connector and the other for the Ethernet cable.
Annke did not add any Ethernet cable into the package, so you will have to use your own, but there is a waterproof lid that you can use to make sure that no water will slip in between the connectors (I did like that you can use it on a cramped cable). Since the NC400 is PoE, you can only use an Ethernet cable for both power and data, but you can also use your own power adapter if you don’t have a PoE switch or PoE injector available. I have checked the NC400 (181HC) for a microSD card slot, but, just like on the Annke C500 (I51DF), there doesn’t seem to be one available.

Installation and Setup

Similarly to the C500, the NC400 is a wired-only security camera, so there is no WiFi connection available, but it’s fine since you can rely on a single Ethernet cable to power it on and to send data. There’s also the possibility to use a power adapter and connect the camera directly to a router instead of using a PoE switch or adapter. I would argue that the latter is the better option if you have more than one camera available and PoE has been fantastic for outdoors deployment since it keeps cables to the minimum and you don’t have to worry about feeding power cables outside your home. To mount the NC400, you will need to use the drilling template (from the box), make three holes and use the screws to fix the camera into place (and that’s it).

annke-nc400-camera-app

Afterwards, you should install the Annke Vision app (which is compatible with both Android and iOS), give it access to all the required media and services, otherwise it won’t work and then create a new account (does not require a phone number which is great). I already had the app installed so I simply logged into my existing account and, from the main page, I tapped on the Plus sign (from the top right) and selected Manual Adding since the camera did not come with a printed QR code. Next, I inserted the Serial Number, selected Camera (Wired) from the list, entered a Device Password to activate the camera, enabled the Annke Vision Service and created a Verification Code. That’s all that’s needed and you can change the name or go forward and check the user interface.

Software and Features

The app user interface doesn’t differ that much from when I used it with the C500, so, on the main page, I was able to see the live footage and I got the possibility to view up to 16 simultaneously added Annke cameras (it does make more sense on a larger screen). At the bottom, I got to choose the image quality which can be Basic, Standard or HD (the last one has a slight latency of under a second). Since it’s a wired camera, I suggest using the best image quality to clearly see all the details of the camera’s surroundings and, since the view angle is fairly large (102 degrees horizontally and 54 vertically), it does cover a lot more ground – a bit underneath the 120 degrees of the Argus 3. It’s worth noting that I did see a but of distortions towards the end and left side (the unwanted fish-eye effect), but it was still quite tempered. Next to the image quality icon, I could digitally zoom on the live footage (and move around the image with my finger), quickly capture a photo or start recording.

annke-nc400-camera

As for the image quality, using the max HD setting, it’s very similar to the Reolink RLC-511 during the day since both rely on the SuperHD resolution to deliver more detail and better colors, but the NC400 does get a slightly sharper image due to the 2560 X 1440p resolution. During the night, as I said in the introduction, I haven’t yet tested a camera that can rise up to the performance of the Annke NC400. As you can see from the images that I took with the app, the light sources aren’t overblown, there is very little noise (and that only far away) and it’s worth mentioning that the cars are about 200 feet away (the advertised range is only up to 100 feet, so it was an understatement). I have seen colored night vision before with other cameras (such as Argus 3), but it’s clear that the image quality is better and above what the human eye can perceive during the night.

Pages: 12

Annke NC500

-

Annke NC500

Pros

  • Excellent color night vision
  • PoE + DC support
  • Seamless ONVIF & RTSP integration
  • Spotlight
  • Rugged exterior

Cons

  • No microSD card slot
  • No Cloud storage available
logo

Mark is a graduate in Computer Science, having gathered valuable experience over the years working in IT as a programmer. Mark is also the main tech writer for MBReviews.com, covering not only his passion, the networking devices, but also other cool electronic gadgets that you may find useful for your every day life.


[ad_2]
 

mkseriesdigitalpoint Copyright © 2012 Fast Loading -- Powered by Blogger